Before you begin using the Virtual Counseling Room (VCR) software, we strongly advise that you review the tutorials below to take advantage of all the features for you and your clients.
Adding Clients & Assigning Rooms
-
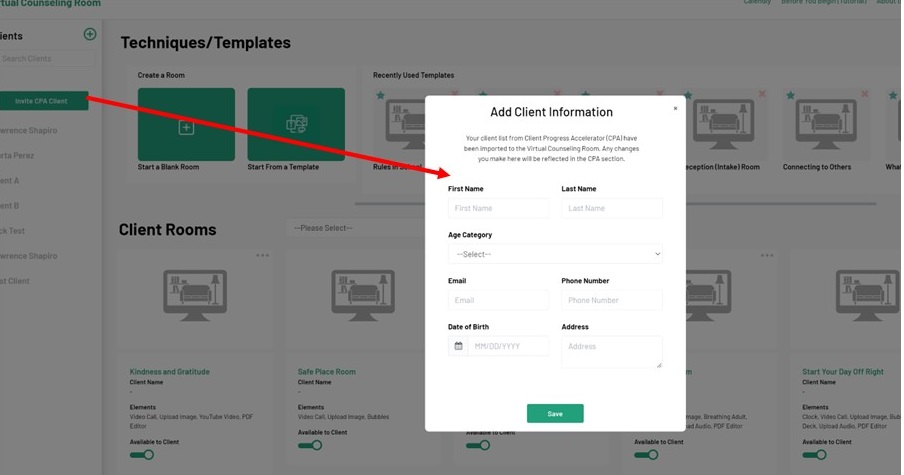
Click the plus sign by “Clients.”
-
Fill in the client information and click “Save.”
-
An e-mail is automatically sent to the client to create a password and sign into their portal.
-
Click the 3 buttons in the top right corner of the Room and choose “Assign to Client.”
-
Assign the Room to any client you have added.
-
You can create multiple Rooms for any client (but you are limited to 40 Rooms total).

Choosing a Room Template
-
Click the “Start From a Template” green box.
-
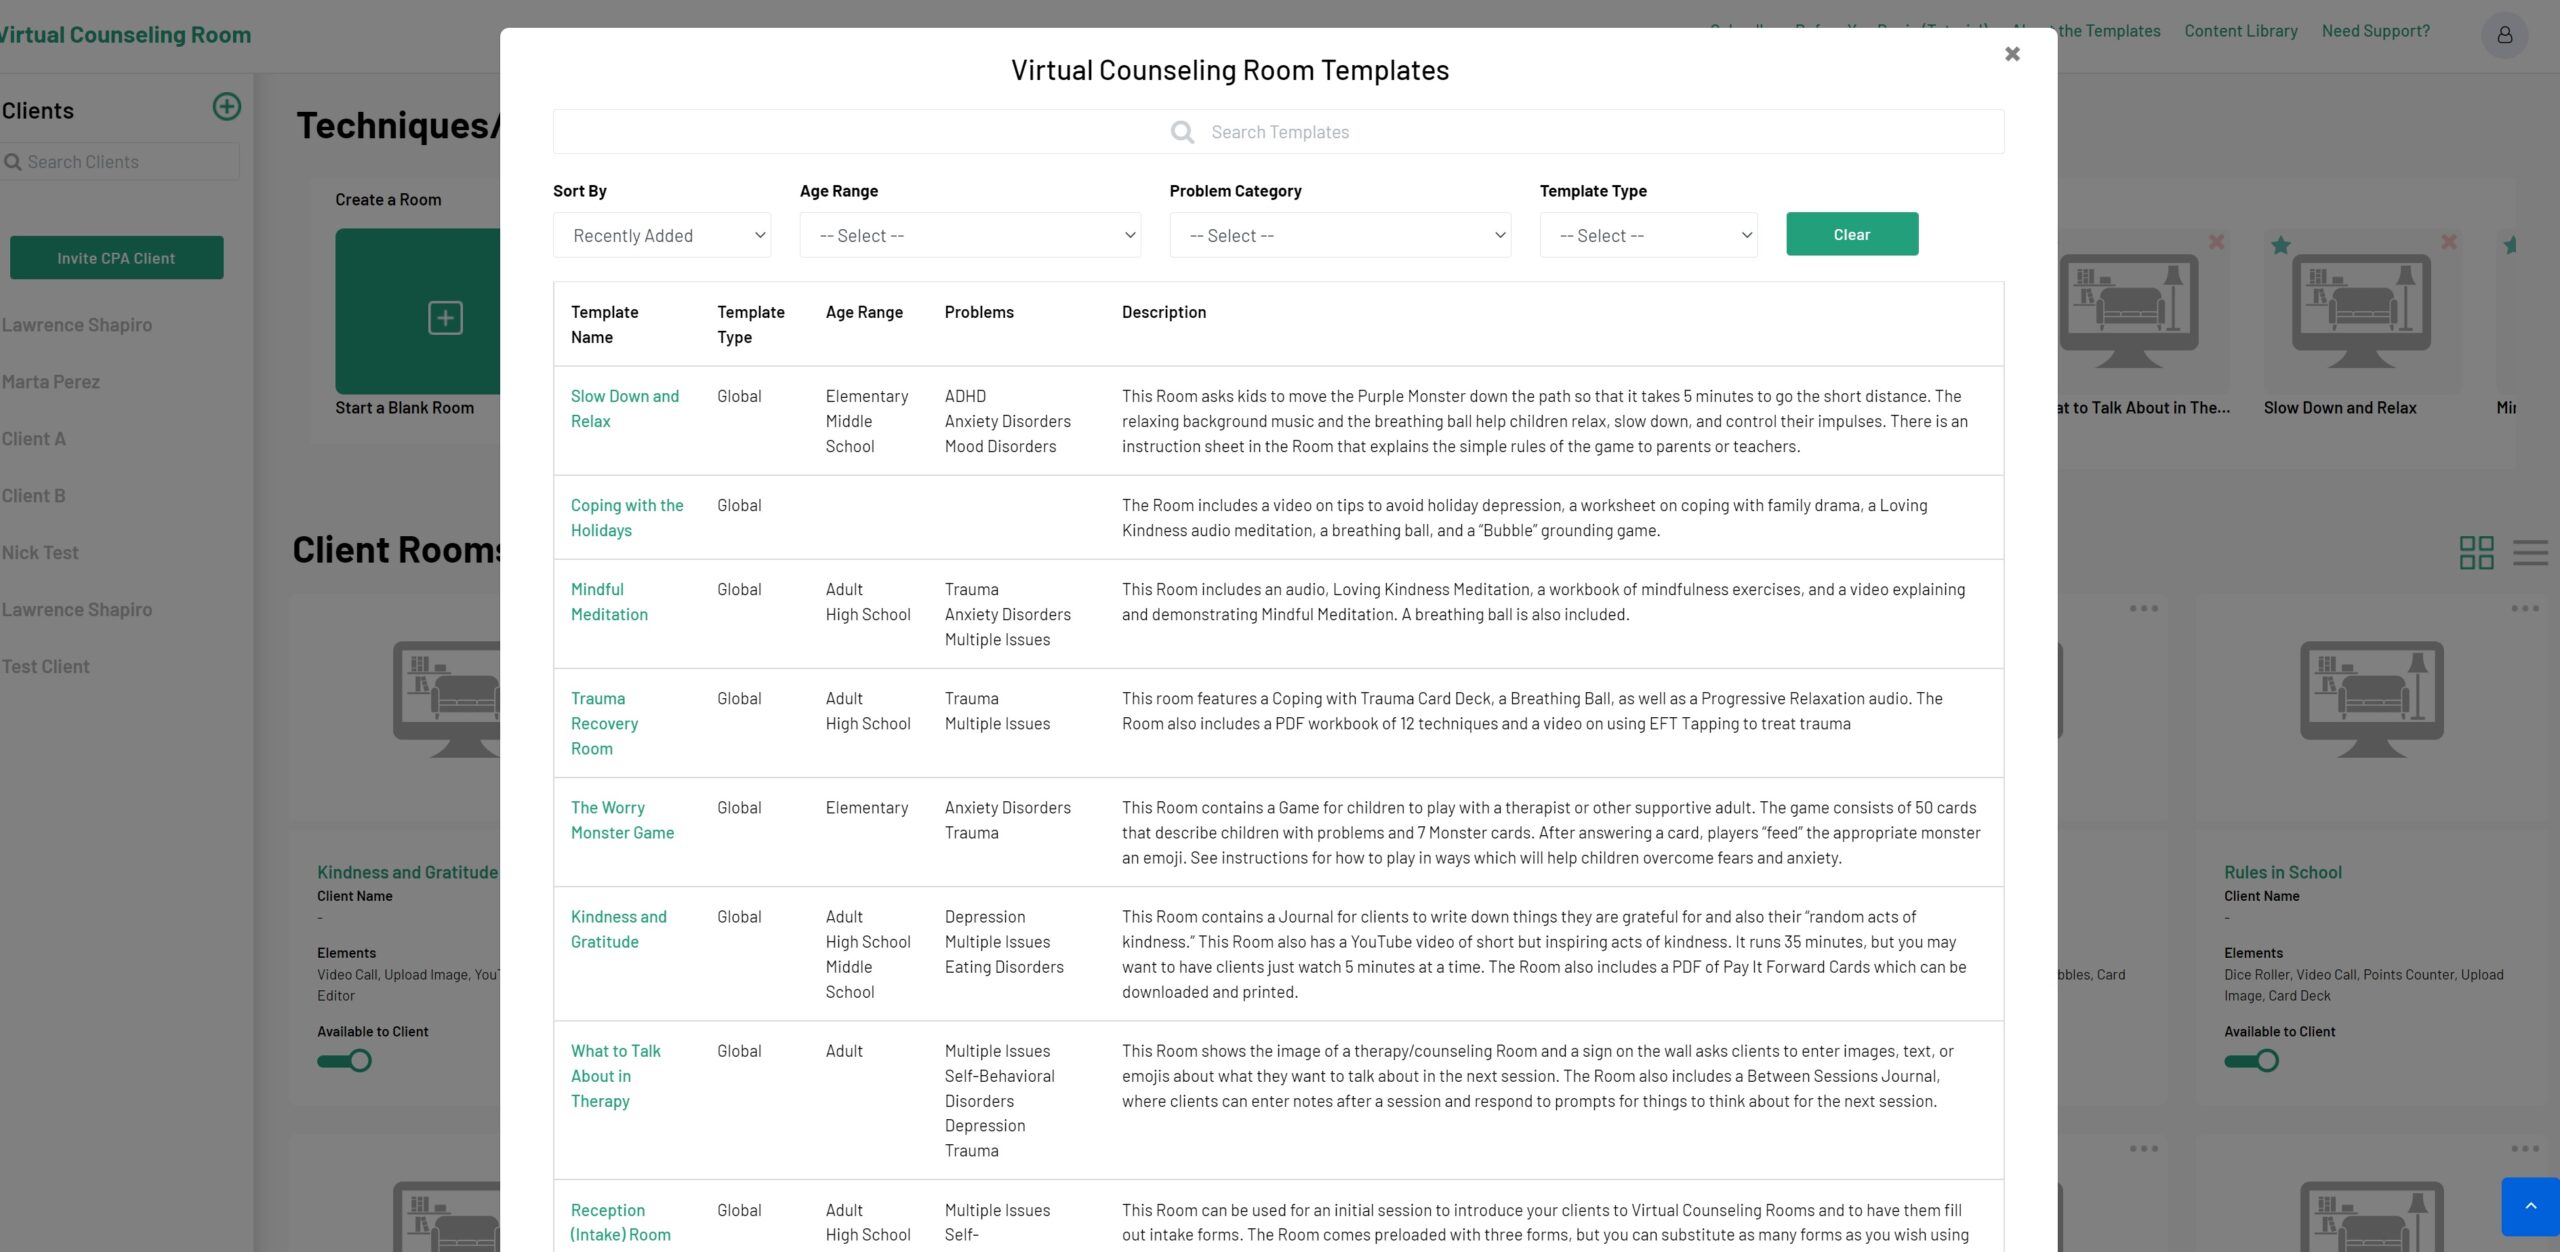
This will open a list of all the Template Rooms created by the company to date.
-
You can search for a Template for a specific problem, and you can also filter the Templates by Age and by Problem.
-
Click the button “Use This Template” to create a new Room in your portal.
-
Once you create this Template, You can modify any way you like to use with your clients.

The Elements You Can Use in a Room
-
Elements come preloaded in a Room if you are using a Template.
-
You can delete, move, resize, or add Elements.
-
Click here to see a review of all the Elements
-
You can lock individual Elements in place if you don’t want them to be moved by the client.
-
The client has a similar menu of Elements, but they are limited to uploading images, videos, audio, and YouTube videos. They can also use the Stickers, Emojis, Text and Drawing Tools, and of course any Elements the therapist or counselor adds to their Rooms.
-
Click here for a complete list and explanation of all the Elements in the Virtual Counseling Rooms.
We strongly suggest that both you and your clients always view the Virtual Counseling Rooms in Full Screen Mode to view and use all of the interactive Elements.
Creating Your Own Rooms
-
Click the green “New Room” square under Techniques/Templates.
-
Name the Room.
-
You will be taken to an empty (blank) Room.
-
Add any Elements you wish to put in the Room. Click here to see all the Elements.
-
Go back to your portal and assign the Room to a client by clicking the 3 dots in the upper right-hand corner of the Room icon. This will place the Room in your client’s portal UNLESS you toggle the “Available Offline” bar by clicking on the left of the bar (the bar will turn grey).
-
You can make the Room available to your client offline at any time.
-
IMPORTANT: Please note that you will have to make the Room available to your client before meeting in the Room for a telehealth session.
-
You can change the name of the Room and the contents of the Elements at any time.
.
Adding Text to the Room
-
You can add text anywhere in your Room by clicking on the text icon (“T”) on the left toolbar.
-
You may want to make the text more visible by changing the color, size, or background.
-
Text can be moved anywhere in the Room, but you may also want to lock the text box if it is a heading or serves as directions for the client.
-
To edit text once it’s in the room, click on the “Edit” icon on the bar at the top of the text.
Using & Creating a Card Deck
-
When you click on the “Card Deck” Element, the Card Deck Creator will appear in the Room.
-
You will see a variety of card decks already created for you to use in different Rooms.
-
Card decks created by the company are marked with a green star. Just click on the name of any Card Deck to open it in a Room.
-
To create your own card deck, click the “Card Deck” Element and then click the plus sign, “Create a Deck.” This will open the Deck Creator. Begin by naming the deck.
-
Click “Add a New Row” to add your first card and subsequent cards. Add copy and/or upload an image to the front and back.
-
Click “Add to List.” Once added you can preview an individual card, edit the card, or delete the card. You can add up to 100 cards. Click the “Finish and Save” button when you are done.
Uploading PDF Tools & Forms
-
Click on the “PDF Editor” to add the uploader to the Room.
-
Click on the button “Upload PDF.”
-
Click “View/Edit PDF” and it will open in a new window.
-
Use the editing tools to make changes if you wish and instruct your client to do the same. You and your client can make as many changes as you like and each change will be recorded.
-
Note that you can also download the PDF to a computer at any time.
Creating Your Own Templates
-
Create your own Template from any Room you like.
-
You can then modify this further, adding or subtracting Elements and Content for individual clients.
Connecting with a Client for a Session
-
Use your own scheduling software or use our partner Calendly to schedule an appointment and send reminders.
-
Open the Room you want to use with your client by clicking the green “Notify Client” button.
-
If your client has been assigned multiple Rooms, they will see the designated meeting Room highlighted in green.
-
They click on that Room, and you will see their name appear in the Room when they enter.
-
At that point, you can start your Video Telehealth Session.
We want your clients to get all the benefits they can from the Virtual Counseling Rooms. Here is a link to a Tutorial Page for Clients.
How Clients Use Rooms “Between Sessions”
-
The client signs in to their own portal.
-
They only see the Rooms you have assigned to them and allowed them to access.
-
They can use the Rooms between sessions, and they will enter a room with a green border for a telehealth session.
-
Clients have access to their Rooms anytime they sign in. They can use the Rooms you have created by themselves or with others sitting in front of a computer. For example, a parent and child might play a game in a Room together.
-
You can chat back and forth with your client between sessions using the “Chat” Element. When either person has a message the Element will show a red dot, which indicates you have a message waiting for you.
